

awaiting for that day when you'll decide to continue in the making of it(It's improbable to happen).
The interest get lost when you feel that after working many hours or days in your project you have made no real progress, or you just don't know how much work left to finish the project. The other reason for abandoning the project is getting bored of it, so don't make a game just for making a game, make a game because you actually want this game to be made, and be sure that the project is small enough for you to finish it, and don't die trying eternally(Please, avoid whenever possible making a survival game about open world exploration with RPG elements and procedurally generated stuff if you're a one man team!).
Knowing how much work you'll have to do to finish the project is essential, first you have to be very organized, don't just start a game from a cool idea, because once you implement that... now what? you don't have enough ideas to fill the other part of the project, and then you stop to think, and make, think and make again, you will notice you're not progressing much, because you don't have a measure of how much of the project left, as you can keep eternally adding content to that idea you got initially. You will get tired then, and failed again! your project will die in "the folder"!
Organizing the project can be very time consuming, you have to take in consideration everything, that includes your skills(Programmer, artist, composer...), your available time, from where you're going to get the resources you can't make(You can read my article about resources, that may help you in some way), writing the entire game(The plot, the characters, the possible dialogs, the game mechanics, the maps, the endings), and last but not less important, the concept art.
It's specially important to guide yourself through whatever you wrote, don't go beyond that because maybe you'll not return. At the moment you end up all the things you wrote, you can proceed to add extra content if necessary(You may be tired at that moment, so take a day to rest, but not much longer, as you can change your mind and leave it as).
To do the concept art you don't have to be a true artist, I'll show you some of my maps drawings of "Into The Gloom"!.

While making "Into The Gloom" I discovered my method for organizing everything and don't die trying, so the things I did were these in this order:
-Write down everything first!. The ideas here can come very slow, and then of a sudden you get an amazing idea to connect all your wandering and bizarre plans, in my case ideas came while talking about weird things with my brothers, then I though about if the idea of the guy in comma and the "gloom" realm has some kind of sense, the thing about the shadows and the hanged men, how to connect that? well, I just wrote down every possible question and then discussed with everyone around my house how can that be explained? I wrote and wrote till everything had sense, and then, proceed with the concept art.
-Make a basic sketch of the possible maps, beginning from drawing the parts described in your main plot, and then just adding new rooms, some obstacles to reach that part, and adding the logical connections with the previous and the next map, for example is illogical to start a level climbing an stair when you just ended the previous map going through a door(This actually happened to me...).
-Implement the game mechanics as described in you writings, in the case of my game that included programming the basic actions as picking objects, scrolling the inventory, and displaying text when interacting with an object. I also tried to make a generalized script for interacting with every kind of thing, one for teleporting(Level to level), one for the single description object, one for the key items on the map, the global function "Die()":D and many other things. Map specific events scripts comes when you finished to build each one of the maps, this one of the exceptions of "implementing everything first", and the other ones will be interface stuff like the HUD, the main menu, and that stuff. Some example of generalized scripts I made.

Now comes the FUNNY part!(Depending if you enjoy more art stuff than programming), The model and texture making/ joining.
If you have passion for modelling and making textures you'll love this part of the project! and once you're here there are big chances for you to actually finish your project :D!(If you are not a good artist, you can find textures on cgtextures.com, read more about resources on my other articles ;)).
I don't recommend looking over the internet for 3D models, for many reasons, firstly your game art is something very personal, all your graphics should maintain the same style, and models usually comes with personalized textures. In my case that was impossible to find, because my art is very simplistic and very specific, it's not very common to see pixel art 3D models on the internet(Not for free of course, you can always pay an artist for you, but that will not be cheap for your humble project), and the other reason is that most models on internet are for designers with high poly count, that's not very cheap to render.
You can also find game specific sites selling 3D models, like the Unity3D asset store! the problem here is that you need to invest money in that and also someone else may be using these models in his/her project! and is not very nice when someone recognize a resources in your game... That happened to me in one gameplay video of "Into the gloom" in youtube, one guy commented "The audio is the same as in Dungeon Nightmares", haha, that's because I used creative commons based sounds, they are freely distributed over the internet and many people use them in their projects.
-So we have our maps drawn on the paper, or in the computer, now lets just make them in 3D! I used Blender for my models, is very comfortable once you learn to use. There are 2 ways of modelling a map, making modular pieces and then join them in your game engine, or like in my case, go wild and make 1 model for the entire map!
You may be wondering how big is the texture I used for every one of my maps. You wanna see if? here it is!

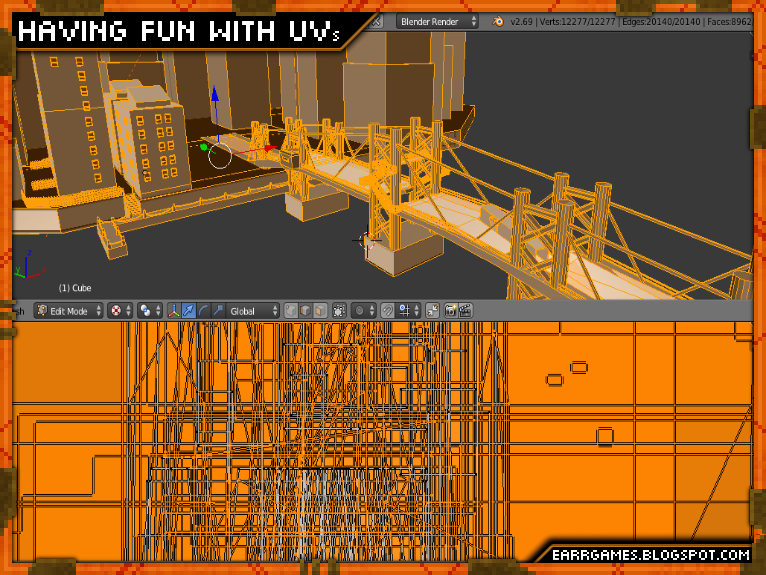
Texture and mapping comes together! so you'll be jumping from one to the other, at least at this points you shouldn't be jumping through scripting/modelling/texturing as that can easily bore you and kill your project.
-After finishing all of the maps, you can proceed to build them in your engine, now you can implement that map specifics scripts. As you finish building a map you may be tired for beginning at the next one. don't use that time for sleep! use it for start making or searching your sounds and music! hearing the sounds of your game will motivate you even more to finish the remaining maps, as the sounds will bring to life your dry and plain maps!
-The last part of level design, adding more detail, in my case at this point I modeled small props as the vending machines an the trash bins.
-Now you can polish all the HUD and GUI related stuff, take your time to design well every piece of the interface, as the player will see it along all the game playing process, make the menus, the credits, the endings.
-You are done! start the beta testing process! find some nice guys around you or over the internet to give you feedback! bug report, opinions and all of that.
PD: I'll not make marketing and publishing recommendations because I had not a plan when my game came out in July 19th, I was just happy because Desura accepted the game in the store! but 1 thing is for sure really important, make a gameplay video and filter it on youtube, or contact the youtubers and give'em a copy of your game to test!
So well, I hope you liked reading my experience, considering my boring and repetitive way of writing(I'm not English speaker! Hablo español :D). Any comment or you just want to know more about everything feel free to send me a mail to earrgames@gmail.com
Thanks for reading! :D